Thingiverse
Robo3d R1 E3D Flex Filament Guide by valkary007
by Thingiverse
Last crawled date: 3 years ago
April 14, 2017 Update: Apparently, the R1+ has a different feeder geometry, so it does not fit the R1+. R1 is still all good though :-).June 21, 2016 Update: A few users have had problems and we're trying to figure out if its the dimensional accuracy of the printed part or if its something less fundamental. I'm going to get back to printing with flex and i'm sure the part will be updated.Nov 22, 2015 Update: A user has successfully used this part using PETG with the stock hexagon hot end. They couldn't print with PETG previously without the material bunching up under the hot end. Keep the posts coming!Nov 15, 2015 Update: By popular demand (2 requests in comments), I've added a variant where the PTFE flare is removed. Anyone with a robo3D should be able to use this, but I need the community to test it. I would first try it with regular filament, to make sure the hobbed bolt and bearing still push the filament as efficiently, and then try with Flex. Try slow speeds at first (10mm/sec?). Thanks!
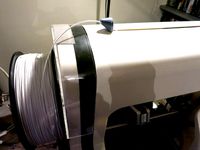
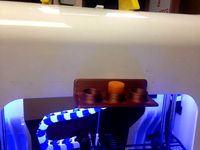
Video Here: https://youtu.be/5TzSODHT6Zk 215 Degrees, 15mm/sec, Filaflex, 110% extrusion, 0.1mm layer height, 0.3mm nozzle.
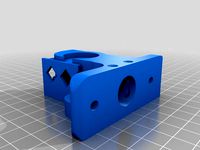
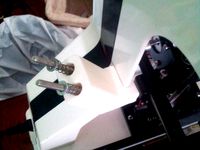
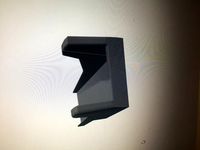
I have a Robo3d R1 with an E3D Hot end and I've found that flex material (NinjaFlex, FilaFlex) does not print reliably, if at all. When installing the E3D hot end, it is suggested to drill out the 'filament hole' beneath the hobbed bolt so the PTFE tube can be cut just under the bolt. While this worked OK, I had reliability issues.
The problem is that printing with Flex is like pushing a rope: it simply buckles in the transverse direction rather than applying force axially. If the rope is constrained in a tube, then as long as the axial force is higher than the friction of the ''rope' against the tube, it will slide through it.
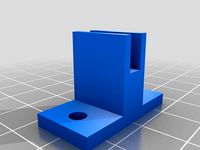
I made a part that fills in the gaps between the hobbed bolt, bearing, and 'tube' so when the flex filament is pushed, it can't box-car and buckle. This part is the result of many iterations and now I'm finally at a design that is reliable.
Instructions:
1) Get a Robo3D, install the E3D hot end, and drill out the filament hole. This will allow the PTFE tube to extend from the hobbed bolt all the way down to the hot end.
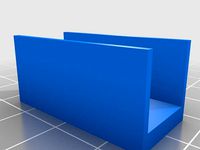
2) Print this part with its large flat face down on the bed.
3) Install: cut back the PTFE tube so it sits in the small half-moon feature when this part is installed.
4) Enjoy printing with flex. I Print with Filaflex : 215 degrees, 20mm/sec, 110% extrustion.
These settings are fine with Ninjaflex as well.
I've found that this part can be left in the extruder assembly and material can be changed out as usual: compressing the springs, yanking the old material out, inserting the new material and turning the gear.
If there is interest, I can modify this part to be used with a non-E3D hot end, but someone else will need to test it. I'd just make a channel where the PTFE tube is, which wil guide the filament into the stock filament hole under the bolt.
Video Here: https://youtu.be/5TzSODHT6Zk 215 Degrees, 15mm/sec, Filaflex, 110% extrusion, 0.1mm layer height, 0.3mm nozzle.
I have a Robo3d R1 with an E3D Hot end and I've found that flex material (NinjaFlex, FilaFlex) does not print reliably, if at all. When installing the E3D hot end, it is suggested to drill out the 'filament hole' beneath the hobbed bolt so the PTFE tube can be cut just under the bolt. While this worked OK, I had reliability issues.
The problem is that printing with Flex is like pushing a rope: it simply buckles in the transverse direction rather than applying force axially. If the rope is constrained in a tube, then as long as the axial force is higher than the friction of the ''rope' against the tube, it will slide through it.
I made a part that fills in the gaps between the hobbed bolt, bearing, and 'tube' so when the flex filament is pushed, it can't box-car and buckle. This part is the result of many iterations and now I'm finally at a design that is reliable.
Instructions:
1) Get a Robo3D, install the E3D hot end, and drill out the filament hole. This will allow the PTFE tube to extend from the hobbed bolt all the way down to the hot end.
2) Print this part with its large flat face down on the bed.
3) Install: cut back the PTFE tube so it sits in the small half-moon feature when this part is installed.
4) Enjoy printing with flex. I Print with Filaflex : 215 degrees, 20mm/sec, 110% extrustion.
These settings are fine with Ninjaflex as well.
I've found that this part can be left in the extruder assembly and material can be changed out as usual: compressing the springs, yanking the old material out, inserting the new material and turning the gear.
If there is interest, I can modify this part to be used with a non-E3D hot end, but someone else will need to test it. I'd just make a channel where the PTFE tube is, which wil guide the filament into the stock filament hole under the bolt.
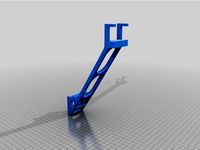
Similar models
thingiverse
free
Robo3D R1 Hobbed bolt Idler for E3D v6 upgrade by NorCAL3D
...us cut in the replacement still applies tension to the ptfe and filament, but doesnt deform the ptfe and create unwanted friction
thingiverse
free
Robo3D R1 PTFE Filament Tube Interface by RogueTrader
...ube interface by roguetrader
thingiverse
robo3d carriage topper for ptfe (4mm teflon tube) push fitting (6mm threads) interface.
thingiverse
free
Gregs Wades Reloaded modified for 1.75mm NinjaFlex / FilaFlex by 3dkarma
...end, eliminating gaps and reducing friction.
update: repaired version of the stls have been uploaded. these should slice fine.
thingiverse
free
JAWe2-E3D by ChrisKiwi
...nly for flexible filament). i used this https://www.thingiverse.com/thing:121210 thing to mount the e3d hot-end on the carriage.
thingiverse
free
Wanhao Duplicator extruder plate Flex File without PTFE extension by notedop
...e at own risk.
abs printing required! this part is touching hot parts of your 3d printer. use filament which can take some heat!
thingiverse
free
Robo 3D R1 modified Extruder E3D V6 by AlteredDimensions
...jaflex. i havent tested this guide yet so print that at your own risk. files included are both stl and solidworks2016 part files.
thingiverse
free
Filament Guide for Titan clone by delboy711
... stl files for ptfe tube diameters of 4.1mm, 4.2mm, 4.3mm or 4.4mm. i found the 4.4mm version was the best fit for my ptfe tube.
thingiverse
free
AJGW Extruder for 1.75 mm Filament by Yvan
...p on the hobbed bolt then send ptfe chunks down to the hot end and clog it up.
don't ask me how i know about all of this...
thingiverse
free
E3D Titan 1.75mm Filament Guides by ChrisParish
...urdy, and i have also added numbers to the bottom to show what size they are: 1,2 & 3 for 4.1mm, 4.2mm and 4.3mm respectivley
thingiverse
free
Robo3D R1 Filament guide by tonycstech
...inting high objects or generally dealing with allot of left to right motion.
spool should be attached on the side of the printer.
Valkary007
thingiverse
free

Denon DN-HP1000 Swivel by valkary007
...). it also includes features that limit rotation in two axes. i recommend partially disassembling the other side for reference.
thingiverse
free
Chevrolet Cavalier or Sunfire 95-02 Manual Shift Boot Bracket by valkary007
...beside new bracket with boot draped over it
4) gluing the new bracket
5) my naked shifter
6) new bracket with boot installed.
fin
Robo3D
turbosquid
$2

Robo3D Feet
... available on turbo squid, the world's leading provider of digital 3d models for visualization, films, television, and games.
thingiverse
free
Robo3d Filament Guide by sjreggel
...robo3d filament guide by sjreggel
thingiverse
robo3d filament guide, to be used with the default robo3d spool holder
thingiverse
free
Robo3D USB Support by GipsyEureka
...robo3d usb support by gipsyeureka
thingiverse
robo3d usb support.
thingiverse
free
Robo3D Camera Mount by robro
...robo3d camera mount by robro
thingiverse
mount for a logitech c270 webcamto a robo3d printer
thingiverse
free
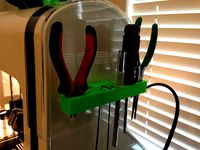
Robo3D Tool Holder by huntergrayson
...robo3d tool holder by huntergrayson
thingiverse
an out of the way place for your tools on the robo3d printer
thingiverse
free

Robo3D Top Mount by ThorMJ
...o the robo3d.
added a version with longer posts so it clears the robo3d handle from the http://www.thingiverse.com/thing:234939
thingiverse
free
Screws' holder Robo3D by GalloEnricoDesign
...screws' holder robo3d by galloenricodesign
thingiverse
a easy support used as holder for screws' extruder
for robo3d.
thingiverse
free
ROBO3D Spool Cap by portdog77
...robo3d spool cap by portdog77
thingiverse
this is a cap i made for my robo3d to hold the filliment next to the machine.
thingiverse
free
ROBO3D OILER HOLDER by Prefab
...robo3d oiler holder by prefab
thingiverse
holds your robo3d oilers so you can always find them
thingiverse
free
robo3d feet simple version by Windpower
...robo3d feet simple version by windpower
thingiverse
robo3d feet remember to print 4.
R1
turbosquid
$10
R1
... available on turbo squid, the world's leading provider of digital 3d models for visualization, films, television, and games.
turbosquid
$10
R1
... available on turbo squid, the world's leading provider of digital 3d models for visualization, films, television, and games.
turbosquid
$15

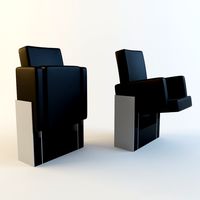
chair r1
...urbosquid
royalty free 3d model chair r1 for download as max on turbosquid: 3d models for games, architecture, videos. (1282574)
3ddd
free
r1
...r1
3ddd
кольцо , ювелирное украшение
кольцо, сделано в свободное от работы время )
3d_ocean
$5

R1 rim
... tire tuner tuning tyre vehicle wheel
a r1 rim modeled to specs. for more car-related objects, please do visit my profile. enjoy!
turbosquid
$5
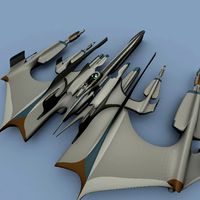
R1 Rocket
... available on turbo squid, the world's leading provider of digital 3d models for visualization, films, television, and games.
3d_export
$59

praga r1
...s for the minimum operational crew, the praga r1 offers the ultimate race-winning motorsport technology in an affordable package.
turbosquid
$80
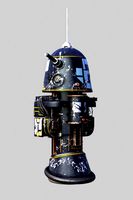
R1 Astromech Droid
... free 3d model r1 astromech droid for download as obj and lxo on turbosquid: 3d models for games, architecture, videos. (1180592)
turbosquid
$49
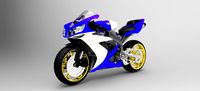
Yamaha R1 2006
... available on turbo squid, the world's leading provider of digital 3d models for visualization, films, television, and games.
turbosquid
free
GHAANON R1.blend
... available on turbo squid, the world's leading provider of digital 3d models for visualization, films, television, and games.
Flex
3ddd
$1

Flex
...flex
3ddd
flex , конференц-зал
кресло для переговоров
3ddd
$1

Flex — I Laccati
... i laccati
3ddd
flex , дверь
двери межкомнатные, окрашенные. flex, коллекция «i laccati»
3ddd
free
Flex Seating 6032
... конференц-зал , flex
кресло модульное, модель flex seating 6032
3ddd
free

TechnoGym Flex Posterior
... flex , тренажер
3ds max 2012 (v-ray) + fbx
technogym flex posterior
3ddd
$1
Банкетка Flex Team
... , flex team
http://www.abitant.com/products/banketka-flex-team-2014-kilt-pouf
3ddd
free
FLEX , I Laccati
...cati
3ddd
flex , i laccati
flex , i laccati
модель p 14 q stucco fiorentino decoro gigli
3ddd
$1
Metal lux / FLEX
...metal lux / flex
3ddd
metal lux
люстра metal lux flex.
turbosquid
$11

Stool Flex
...ty free 3d model stool flex for download as max, obj, and fbx on turbosquid: 3d models for games, architecture, videos. (1673813)
3ddd
$1

Flex by Skandiform
...flex by skandiform
3ddd
skandiform , стул
enjoy
turbosquid
$7

Flex Chair
... available on turbo squid, the world's leading provider of digital 3d models for visualization, films, television, and games.
E3D
turbosquid
$23

E3D - Google Home
... 3d model e3d - google home for download as max, obj, and c4d on turbosquid: 3d models for games, architecture, videos. (1192509)
cg_studio
free

e3d model
...e3d model
cgstudio
- e 3d model, royalty free license available, instant download after purchase.
turbosquid
$2
Syringe C4D (E3D Ready)
...lty free 3d model syringe c4d (e3d ready) for download as c4d on turbosquid: 3d models for games, architecture, videos. (1336720)
turbosquid
$12

Microphone USB E3D and C4D
...ree 3d model microphone usb e3d & c4d for download as c4d on turbosquid: 3d models for games, architecture, videos. (1568216)
turbosquid
$29

E3D - OnePlus 6 Black
...model e3d - oneplus 6 black for download as max, obj, and c4d on turbosquid: 3d models for games, architecture, videos. (1358534)
turbosquid
$29

E3D - Motorola One 2018
...del e3d - motorola one 2018 for download as max, obj, and c4d on turbosquid: 3d models for games, architecture, videos. (1358533)
turbosquid
$29
E3D - Disney MagicBands 2
...l e3d - disney magicbands 2 for download as max, obj, and c4d on turbosquid: 3d models for games, architecture, videos. (1355515)
turbosquid
$29

E3D - Samsung Z4 Smartphone
...e3d - samsung z4 smartphone for download as max, obj, and c4d on turbosquid: 3d models for games, architecture, videos. (1182179)
turbosquid
$23

E3D - Razer Phone model
...del e3d - razer phone model for download as max, obj, and c4d on turbosquid: 3d models for games, architecture, videos. (1231207)
turbosquid
$23

E3D - Alcatel Idol 5
... model e3d - alcatel idol 5 for download as max, obj, and c4d on turbosquid: 3d models for games, architecture, videos. (1212799)
Guide
turbosquid
$15
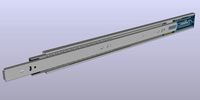
Guide drawer
...squid
royalty free 3d model guide drawer for download as dwg on turbosquid: 3d models for games, architecture, videos. (1261387)
turbosquid
$1
Road Guide
... available on turbo squid, the world's leading provider of digital 3d models for visualization, films, television, and games.
archive3d
free
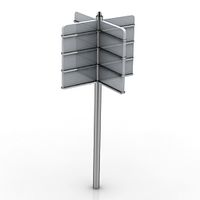
Guide-board 3D Model
...ion sign guide sign
guide-board n170112 - 3d model (*.gsm+*.3ds) for exterior 3d visualization.
turbosquid
$2
soap cutter guide
...
royalty free 3d model soap cutter guide for download as stl on turbosquid: 3d models for games, architecture, videos. (1694030)
turbosquid
$15

Blind Guiding tiles
...free 3d model blind guiding tiles for download as 3dm and dae on turbosquid: 3d models for games, architecture, videos. (1156598)
turbosquid
$69

Japanese Tour Guide
...d model japanese tour guide for download as max, fbx, and obj on turbosquid: 3d models for games, architecture, videos. (1614288)
turbosquid
$10
CNC Linear Guide
... available on turbo squid, the world's leading provider of digital 3d models for visualization, films, television, and games.
turbosquid
$1

Tank Model Guide
... available on turbo squid, the world's leading provider of digital 3d models for visualization, films, television, and games.
turbosquid
$1
Road Guide 2
... available on turbo squid, the world's leading provider of digital 3d models for visualization, films, television, and games.
3d_ocean
$9

Guide Books 3
...sformed separately and each have unique texture map on front and back cover. to make your work easier this model comes in thre...
Filament
3ddd
$1

Filament Cage
...filament cage
3ddd
лофт , filament cage
модель бра, делалась по фото!
turbosquid
$3
FILAMENT COUNTER
...d
royalty free 3d model filament counter for download as stl on turbosquid: 3d models for games, architecture, videos. (1563049)
3d_export
$5

Filament lamp 3D Model
...filament lamp 3d model
3dexport
filament lamp 3d model kevin 54161 3dexport
3d_export
$5

Filament bulb candle 3D Model
...filament bulb candle 3d model
3dexport
filament bulb-candle
filament bulb candle 3d model kevin 54163 3dexport
3d_export
$5

Filament led light bulb
...filament led light bulb
3dexport
realistic 3d model of filament light bulb with v-ray materials.
3d_export
$5
Filament led light bulb
...filament led light bulb
3dexport
realistic 3d model of filament light bulb with v-ray materials.
3d_export
$5

Filament led light bulb
...filament led light bulb
3dexport
realistic 3d model of filament light bulb with v-ray materials.
3d_export
$5
Filament led light bulb
...filament led light bulb
3dexport
realistic 3d model of filament light bulb with v-ray materials.
3d_export
$5
Filament led light bulb
...filament led light bulb
3dexport
realistic 3d model of filament light bulb with v-ray materials.
3ddd
$1

Factory filament metal shade
...factory filament metal shade
3ddd
restoration hardware
restoration hardware. 20th c. factory filament metal shade.